Guide on Merging Video Clips via Movavi Video Editor
Merging video files allow the video clips to play one after another in the video. Merging video files is great for showing your followers in the social media account about all the interesting venues that you have visited. You can determine how the video files are being arranged in Movavi Video Editor. Each video file that is being added in the timeline can be moved to any position you would like to move it.
You should first figure out the plot of the video so that you know how to arrange the video clips to form an interesting video. The sequence of the videos in the timeline represent the appearing sequence of the clips in real time in the video. If you want the clips to play one after another continuously, make sure you put the clips as close as possible.
To join video files in Movavi Video Editor, you must click Add Media Files button to add the video files. The video files can also be opened by dragging the entire folder into the timeline. You can drag one or more video files directly on the timeline to open them. The video file will be added in the form of a rectangle that is labeled with the file name. In this way, you will be able to recognize the video file during the editing process. Get more details at https://www.movavi.com/support/how-to/how-to-join-videos.html.
Prior to exporting the video, make sure you have already review the clips and are certain that there is no more error in them. In case you found some parts that you would like to delete, the scissor tool in the toolbar is available for you to use in trimming and splitting the video clip. To delete the excess clip that you cut out with the scissor tool, you can press the Del button.
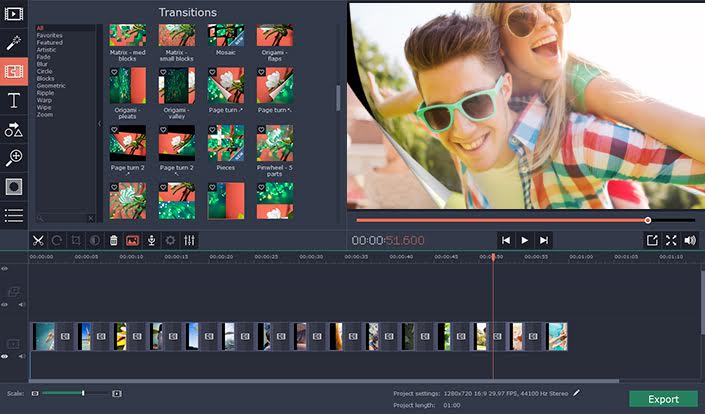
Movavi Video Editor offers over 40 types of transition effects and you can click the Transition tab on the left to browse all the available transition effects. These transition effects can be easily dropped onto the space in between 2 video clips in the timeline. If you select the transition and click the properties button, you will be able to adjust the duration. As you adjust the duration of the transition, you will notice that the rectangle changes to shorter or longer when you move the slider to left or right respectively.
To join video files, you just have to click the Export button and save it as if it is an ordinary video file. You can click the drop down menu to select the video format. From the drop down menu, you can see what codec is being used to export the video file. You can change the resolution and FPS in the export dialog box. The estimated file size gives you an idea on how big the video file will be when you export it. In the save to field, make sure you type in the path of the destination folder. You can also click the browse button to locate the folder you want to use for saving the video file. You can proceed with exporting the video file by clicking the Start button.