WordPress theme from HTML template in Easy Steps
When you are developing a website you must be looking for some awesome WordPress theme but when you don’t find one, you are likely to turn to a theme framework. Alternatively you can also think of coding an HTML5 template and convert it into a WordPress theme.
If you have some basic WordPress programming skills then converting an HTML5 template into a WordPress theme looks to you quite possible. But for that you need to put in the effort and the steps we are discussing in this article for you.
Why to Convert an HTML Template into a WordPress theme?
There are some good reasons to convert HTML template to WordPress theme which we are discussing now. If you use HTML5 template then you will have complete control over every minute detail of the appearance of your website. If you don’t like some part of the template then you can change it. It is easier to change a simple HTML template than a complex WordPress theme.
If you want a WordPress theme which is not used by thousands of other websites then converting an HTML5 template is one way to get a completely custom WordPress theme.
If you have not built a WordPress theme before then you can learn the process of converting a template into WordPress theme here in this article. Here we will start with a simple HTML5 template and turn it into a full-fledged WordPress theme.
Setting up Your Development Environment
If you want to convert an HTML5 template into a WordPress theme then the first thing you need to do is to set up your development environment.
Some of the tools which you will need are:-
A local server for WordPress
There are many options to consider like XAMMP, WAMP, MAMP etc. You can pick anyone.
A local WordPress installation
It is better to build a WordPress theme while you have less number of plugins activated. Hence either create a new installation or use an existing on after deactivating most of the plugins.
Git to tack your changes
It is a good idea to use Github to tack your changes and host the finished product.
You should also familiar with how WordPress themes work and should have a basic PHP coding skills.
Step 1: Find a Template or Create a new one
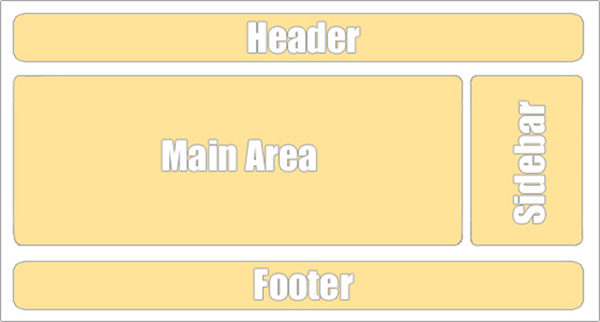
You can convert any HTML template into a WordPress theme but your work will be easier if you pick a template layout which matches the core functionality built into WordPress: a sidebar, a header, posts, pages, and a footer. When you are looking for template or you are coding your own just think how the parts of template will translate into a WordPress theme.
There templates are free and will easily translate to WordPress. Once you have found or created the perfect one, you can move on to the next step i.e. Turning the template into a WordPress theme.
Step 2 : Convert the HTML5 Template into a WordPress theme
Now you must have an HTML5 Template with a directory which includes an index.html file and a subdirectory for CSS and JavaScript. Now You have to copy the whole theme directory into the wp-content/themes/directory of your WordPress development site. Now the WordPress can find the WordPress theme as it is located at right place. Now rename index.html as index.php. Also add a style.css file with a properly formatted theme file header to the theme directory. You also also move the template’s primary CSS file up one level i.e from /css directory to WordPress theme root directory. It means there should be a style.css file in the theme root directory with a proper theme header. Now you can activate your WordPress theme from the WordPress admin area and view your site front end.
Now all of your theme’s CSS and JavaScript resources are in your theme directory, but your HTML template it set to find files relative to your site domian. Means WordPress theme resources are located in http://yourdomain.com/wp-content/themes/your-theme-directory/, but your site template is looking for those resources in http://yourdomain.com.
Hence it is not finding them. Therefore the next step is to add CSS and JavaScript resources to our WordPress theme in such a way that WordPress can find them easily.
Step 3 : Properly Add Scripts and Styles
Now to add scripts and styles to a WordPress theme you will need to create a functions.php file in your theme’s root directory. After you have located all of your CSS and JavaScript resources which you need to add to your WordPress theme, create a function that have all the scripts and resources. Also don’t forget to add your theme’s style.css and then hook the function into your WordPress theme using the wp_enqueue_scripts hook. You should add the function and the hook to your theme’s functions.php file.
After adding CSS and JavaScript, WordPress will now recognize the resources your theme depends on. If you want to actually insert them into your site, you need to add two hooks to your WordPress theme’s index.php file.
wp_head: Should be added just before the closing<head>tag in index.php.
wp_footer: Should be added just before the closing<body>tag in index.php.
Your index.php file will look like with these tags added:
<!DOCTYPE html>

<html lang="en">

<head>

<!-- various meta tags, your site title, etc. -->

<?php wp_head(); ?>

</head>

<body>

<!-- webpage content -->

<?php wp_footer(); ?>

</body>

</html>
After adding those hooks, scripts and styles, your WordPress theme will look like the original HTML template.
In next step we will break index.php into multiple parts so that you can use the header, footer and sidebar with pages, posts, etc.
Step 4: Creating Template Partials
All WordPress themes break the document head out into a header.php file therefore header can be reused with pages, posts, the home page, 404 pages etc. But the header.php is not called directly. It is only used when it is called by a template file like index.php. You have to create at least three template partials:
- header.php
- footer.php
- sidebar.php
Creating header.php
You need to create a file header. Each of your file in WordPress theme should include a file header which is a brief of the purpose of the file. Your file header for header.php should look something like this:
<?php

/**

* The header for our theme.

*

* Displays all of the <head> section and everything up till <div id="content">

*

* @package Simple Blog Theme

*/

?>
After you have file header in place now copy over all of the header code from index.php over into header.php. Now delete all of the header code from index.php and replace it with the get_header() WordPress function:-
<?php

/**

* The main template file

* It puts together the home page if no home.php file exists.

*

* @package Simple Blog Theme

*/

get_header(); ?>

<!-- the beginning of the page or post content -->
Now Creating sidebar.php and footer.php
Create a separate file for all sidebar contents and an additional file for all footer contents. After you copy the code from index.php to the relevant files and deleting it out for index.php, use the get_sidebar and get_footer WordPress functions to tie all of the template files together.
When you are finished, index.php should begin with a file header and get_header, and should end with get_sidebar and by get_footer. Between those three functions should be the main contents of your page. Now look how index.php file will look at this point:
<?php

/**

* The main template file

* It puts together the home page if no home.php file exists.

*

* @package Simple Blog Theme

*/

get_header(); ?>

<!-- all page or post content should be between the header and sidebar -->

<?php get_sidebar(); ?>

<?php get_footer(); ?>
Step 5: Adding the Loop
Loop is a function which queries the WordPress database and generates the content displayed on every page of your WordPress site. Normally, you will have two different versions of loop: One version of loop for your blog page which displays post titles, meta data, featured image and a post excerpt. A second version for your individual posts and pages that displays the full content of the page or post. Also you may want to refine the loop even further by doing variations for individual pages, posts, search results pages etc. Below is how the WordPress loop will look like:
<?php if ( have_posts() ) : while ( have_posts() ) : the_post(); ?>

/* insert post content here */

<?php endwhile; else : ?>

<p><?php _e( 'Sorry, there doesn\'t appear to be anything here.' ); ?></p>

<?php endif; ?>
The comment in that code should have to be replaced with WordPress functions to generate content and HTML tags to display that content properly.
Most public themes break the loop out of index.php and put it into multiple separate files with titles like content.php,content-single.php,content-page.php etc.
Step 6 : Replacing Temlpate file content with WordPress functions
This step varies from one HTML template to another. Now check each template file – header, index, content, sidebar and footer and replace each static content with an appropriate WordPress function.
Start with header.php and replace it with WordPress function.
Setting Up the Header Menu
This is a two-step process:
In first step add the header location to your WordPress theme by adding a function to functions.php. Then insert the menu into header.php. You have to use the register_nav_menus function to add a menu location to your WordPress theme.
Now you need to use the wp_nav_menu function in header.php to generate your menu. Below is the code that adds the menu to WordPress theme’s header.php looks:
<?php

wp_nav_menu( array(

'theme_location' => 'primary',

'menu_class' => 'nav navbar-nav',

'container_id' => 'bs-example-navbar-collapse-1',

'container_class' => 'collapse navbar-collapse',

));

?>
I have added two classes to the menu itself i.e nav and navbar-nav and also an ID and two classes to menu container. By copying these selectors from HTML template will ensure that the menu picks up the template styles.
Final Step
If you have followed all of the above steps then you have converted an HTML5 template into a functional WordPress theme.
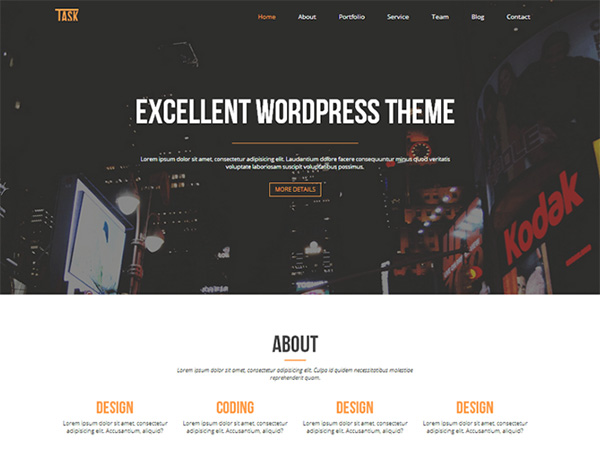
If you just check the template at the top of this tutorial you will see that it is similar to that. You must be happy for what you have accomplished so far.
Conclusion
Although converting an HTML5 template into a WordPress theme looks to be a time consuming and difficult task but if you follow the process carefully then you will get a unique WordPress theme based on which you can build your unique WordPress site. Obviously you must be learning lots of things in this process.
Author Bio: Alex Jones is the author of this post. She is an experienced WordPress developer for hire currently working in Wordprax Ltd, a leading WordPress development company in US. Alex has written many articles and blogs related to WordPress website development and website security.